Mount Taranaki Summit Hike New Zealand
How to take on and survive this beautiful and brutal volcano

What is Mount Taranaki?
Mount Taranaki is a huge volcano on the south-west part of the north island of New Zealand. It’s located in Egmont National Park and practically has its own peninsula! This volcano is known for its almost perfectly round cone shape which can be admired from the trails that circle it. (Don’t worry it’s been dormant for a while)
Between the beautiful views and the trails that look like something from another planet, Mount Taranaki has become a popular hike on the North Island of New Zealand. I’m pretty sure it’s second only to the Tongariro Crossing when it comes to ‘epic volcanic experience’ hikes in NZ.
When to Hike Mount Taranaki
The Best time to hike Mount Taranaki is between December and April.
Unless you’re an experienced mountaineer with crampons and ice picks (and the knowledge of how to use them) you do NOT want to climb Mt Taranaki in the winter (June-September). The steep slopes of the mountain become icy slicks that lead to cliffs and other fun and deadly things!
I hiked Mount Taranaki in early February (which is mid-summer in the Southern Hemisphere) and even though it was in the mid-seventies (or high teens in Celsius) near the base, the crater top of the mountain was full of snow and I was really glad to have my extra layer of merino wool.
Where is Mount Taranaki?
Mount Taranaki is on the Southwest side of the North Island of New Zealand, Just south of New Plymouth. Unfortunately, It’s very difficult to reach by bus.
I recommend grabbing some friends and renting a car for a few days or catching a ride with some other friendly backpackers!
It’s a
5 ½ hour drive from Auckland
4 ½ hour drive from Taupo
6 hour drive from Wellington
We drove from Auckland and stopped at the botanical gardens in Hamilton on the way there.
It’s too long of a drive before or after the summit hike, so I highly recommend driving to the mountain the day before and staying nearby.
After the hike you can drive a few hours back to your destination and then stop for the night, which is what we did, or you can just hang out around New Plymouth until the next morning.

I don’t recommend planning to get very far after the hike as you don’t know how long it will take you, and the trail down the mountain is quite hazardous- not something you want to run down to get to your car!
Where to stay near Mount Taranaki
There are LOTS of options to stay around Mount Taranaki:
Option 1: New Plymouth
The biggest town near mount Taranaki, with plenty of accommodation options
Option 2: Random Small town near Mount Taranaki
There are plenty. Take your pick.
Option 3: In Egmont National Park
There are a few lodges in the park where you can find a bunk for the night.
I recommend picking one based on the trail you are planning to take.
There are also DOC huts and privately owned huts along the trails if you plan on doing multi-day hikes.
We took the only trail up to the summit of the mountain and stayed in The Camphouse, which is right next to the visitor center in the park and the start of the trail.
The Camphouse is $25/night per person for a bunk in a shared room and you must bring your own sleeping bag.
Beware: it can get COLD in there at night even in the summer!
But this is the view of the Mountain you get from the Camphouse at Sunrise!
Mount Taranaki Summit Hike New Zealand
Total time: 5-6 hrs UP 3-4 hrs DOWN
Difficulty: HARD
Total Distance: 12.6 km
Elevation Gain: 1572m
Trail type: Return via the same route
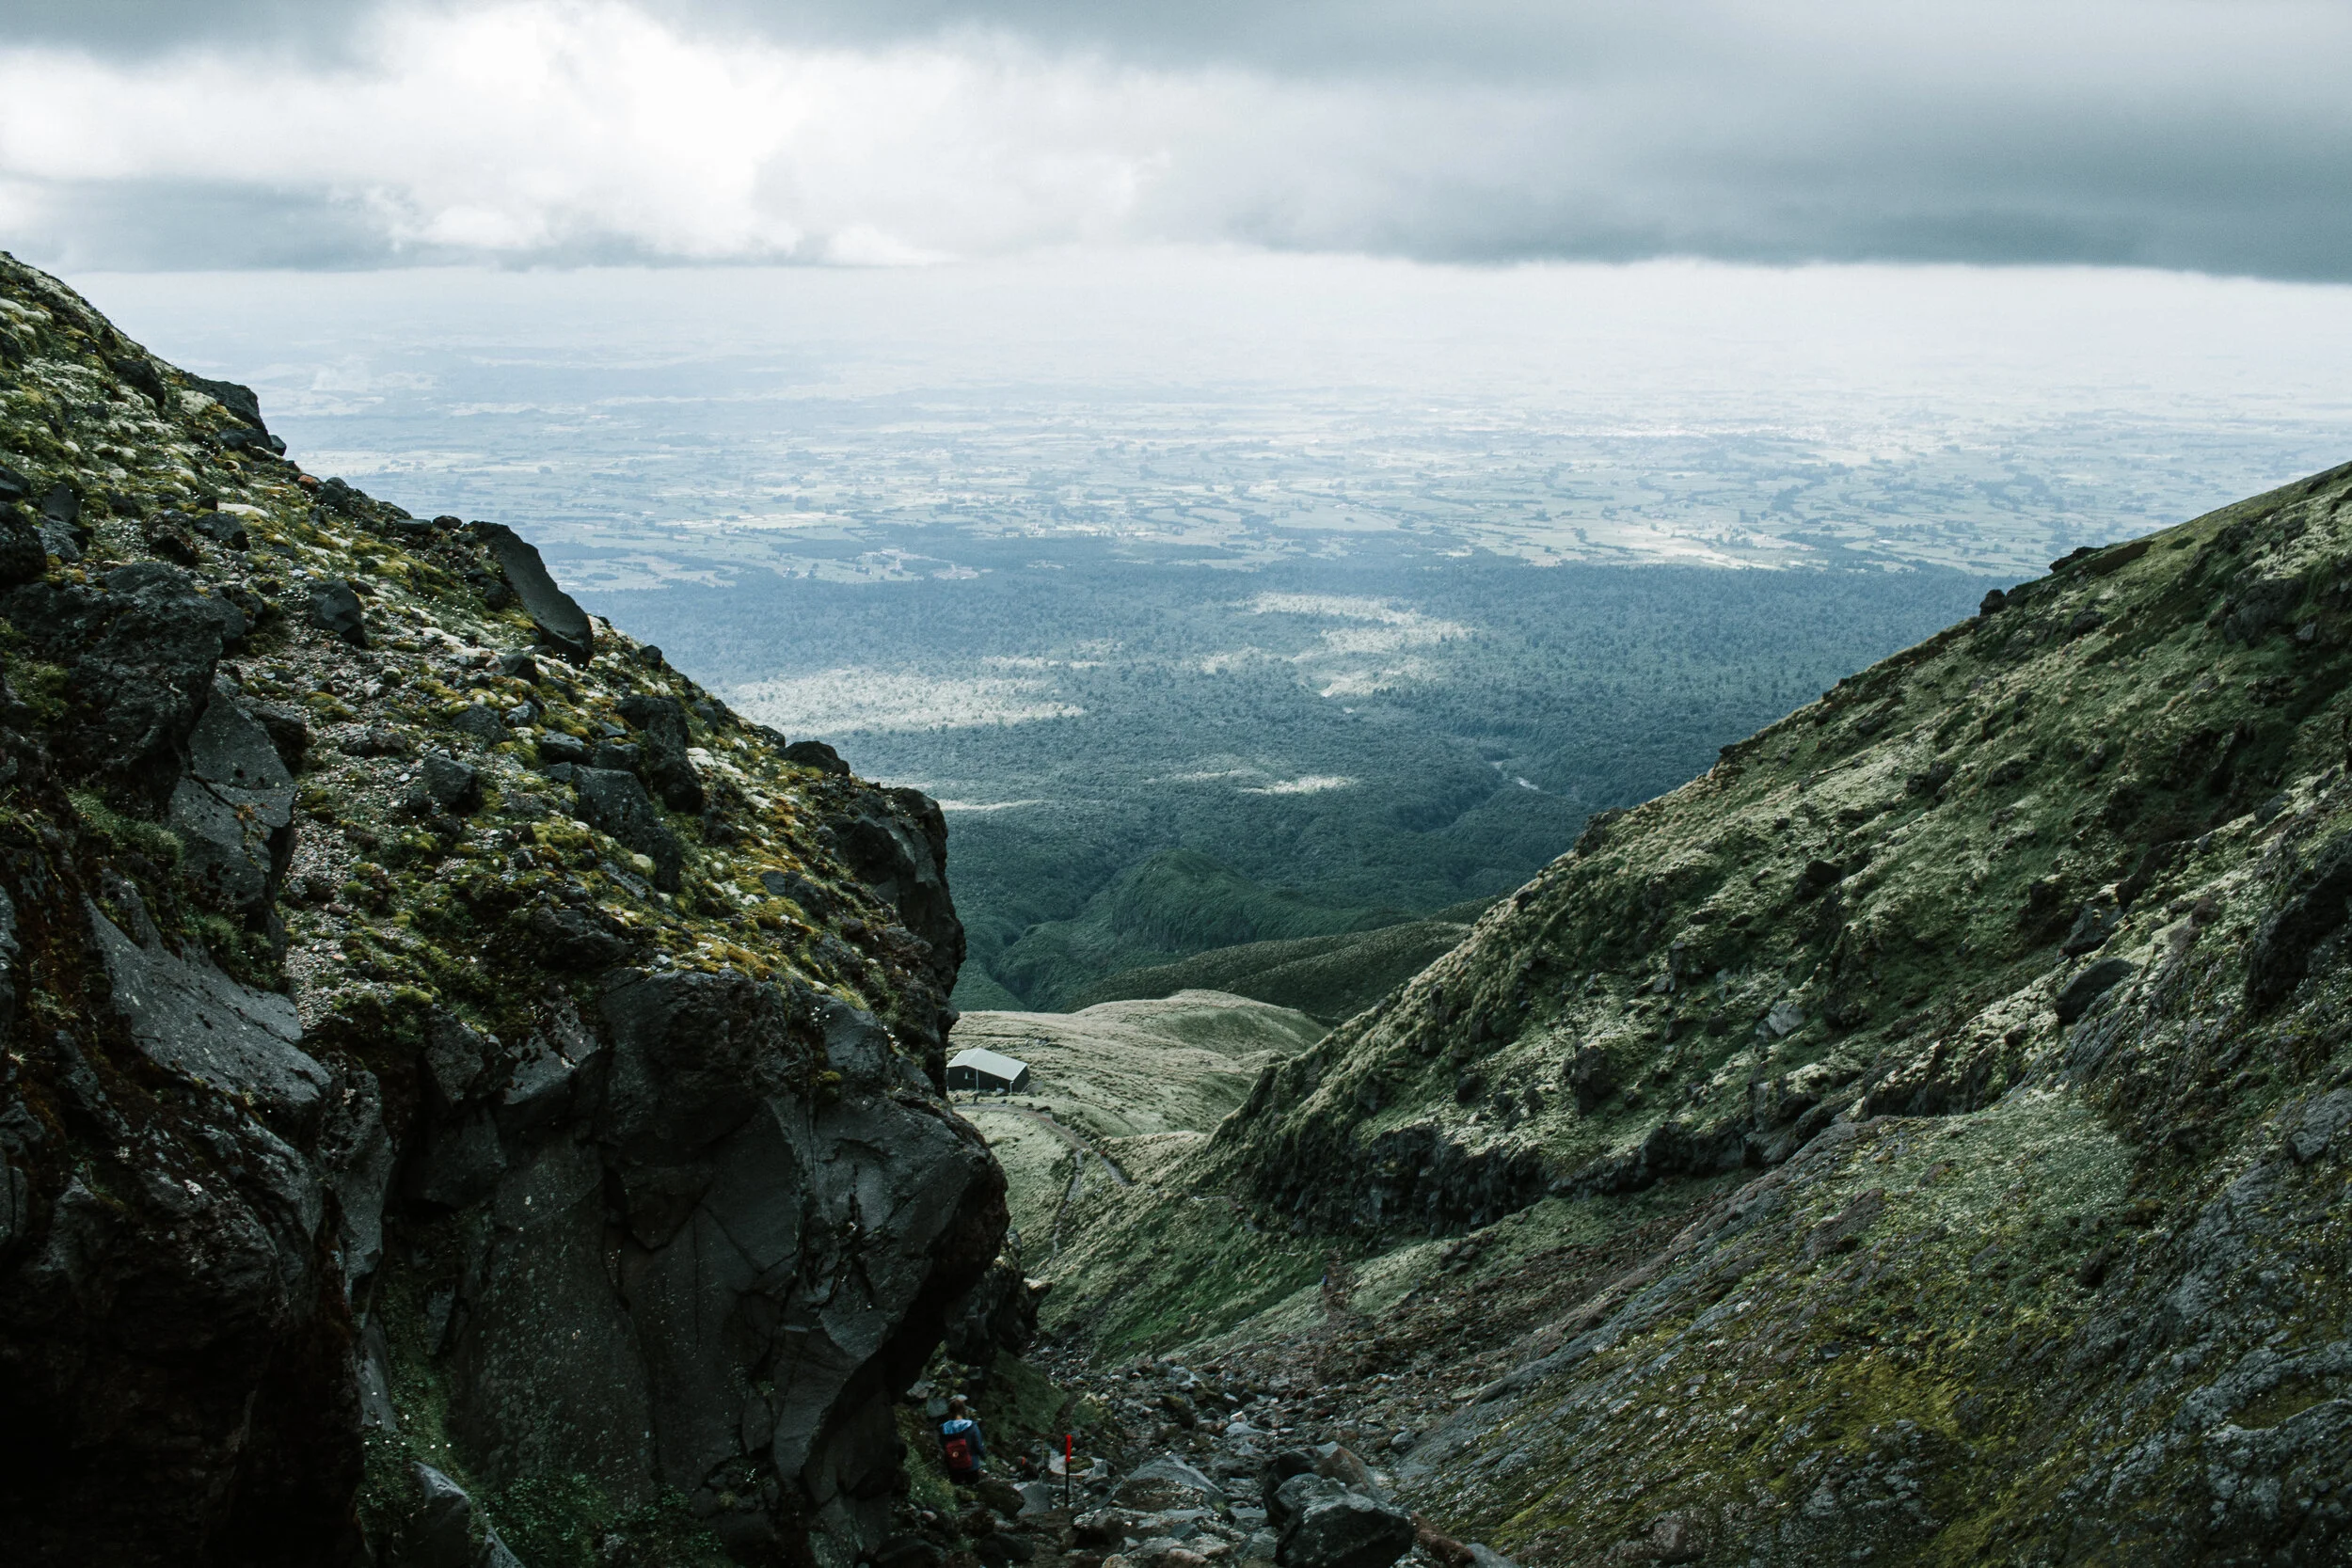
You start at the visitor center and follow the trail up the mountain- this part of the trail is actually a road and is very wide and has even footing.

It does get quite steep in some parts but is manageable.
You’ll follow this road for 4 km up to the Tahurangi Lodge.
It should take you 1.5-2 hours.
Just below the lodge, there is a bathroom (the only one on the trail) so it’s wise to use it!
After the lodge is where this hike gets intense. Even though you have a mere 2.3km left to reach the summit, it will probably take you 3-4 hours.

First you go through the Hongi Valley, following a narrow, rocky trail up past towering rock faces and climb a LOT of stairs.
I hate to tell you that the staircase of doom is, however, the easy part. When you reach the top of the stairs you’re going to encounter what is known as a scree slope, which is a polite way of saying the actual surface of hell.
The scree slope is basically a giant gravel hill, and it’s a STEEP one.

One step forward and you slide half a step back, and you’re going to FEEL the burn in your thighs and pretty much everywhere else.
The views are nice though.

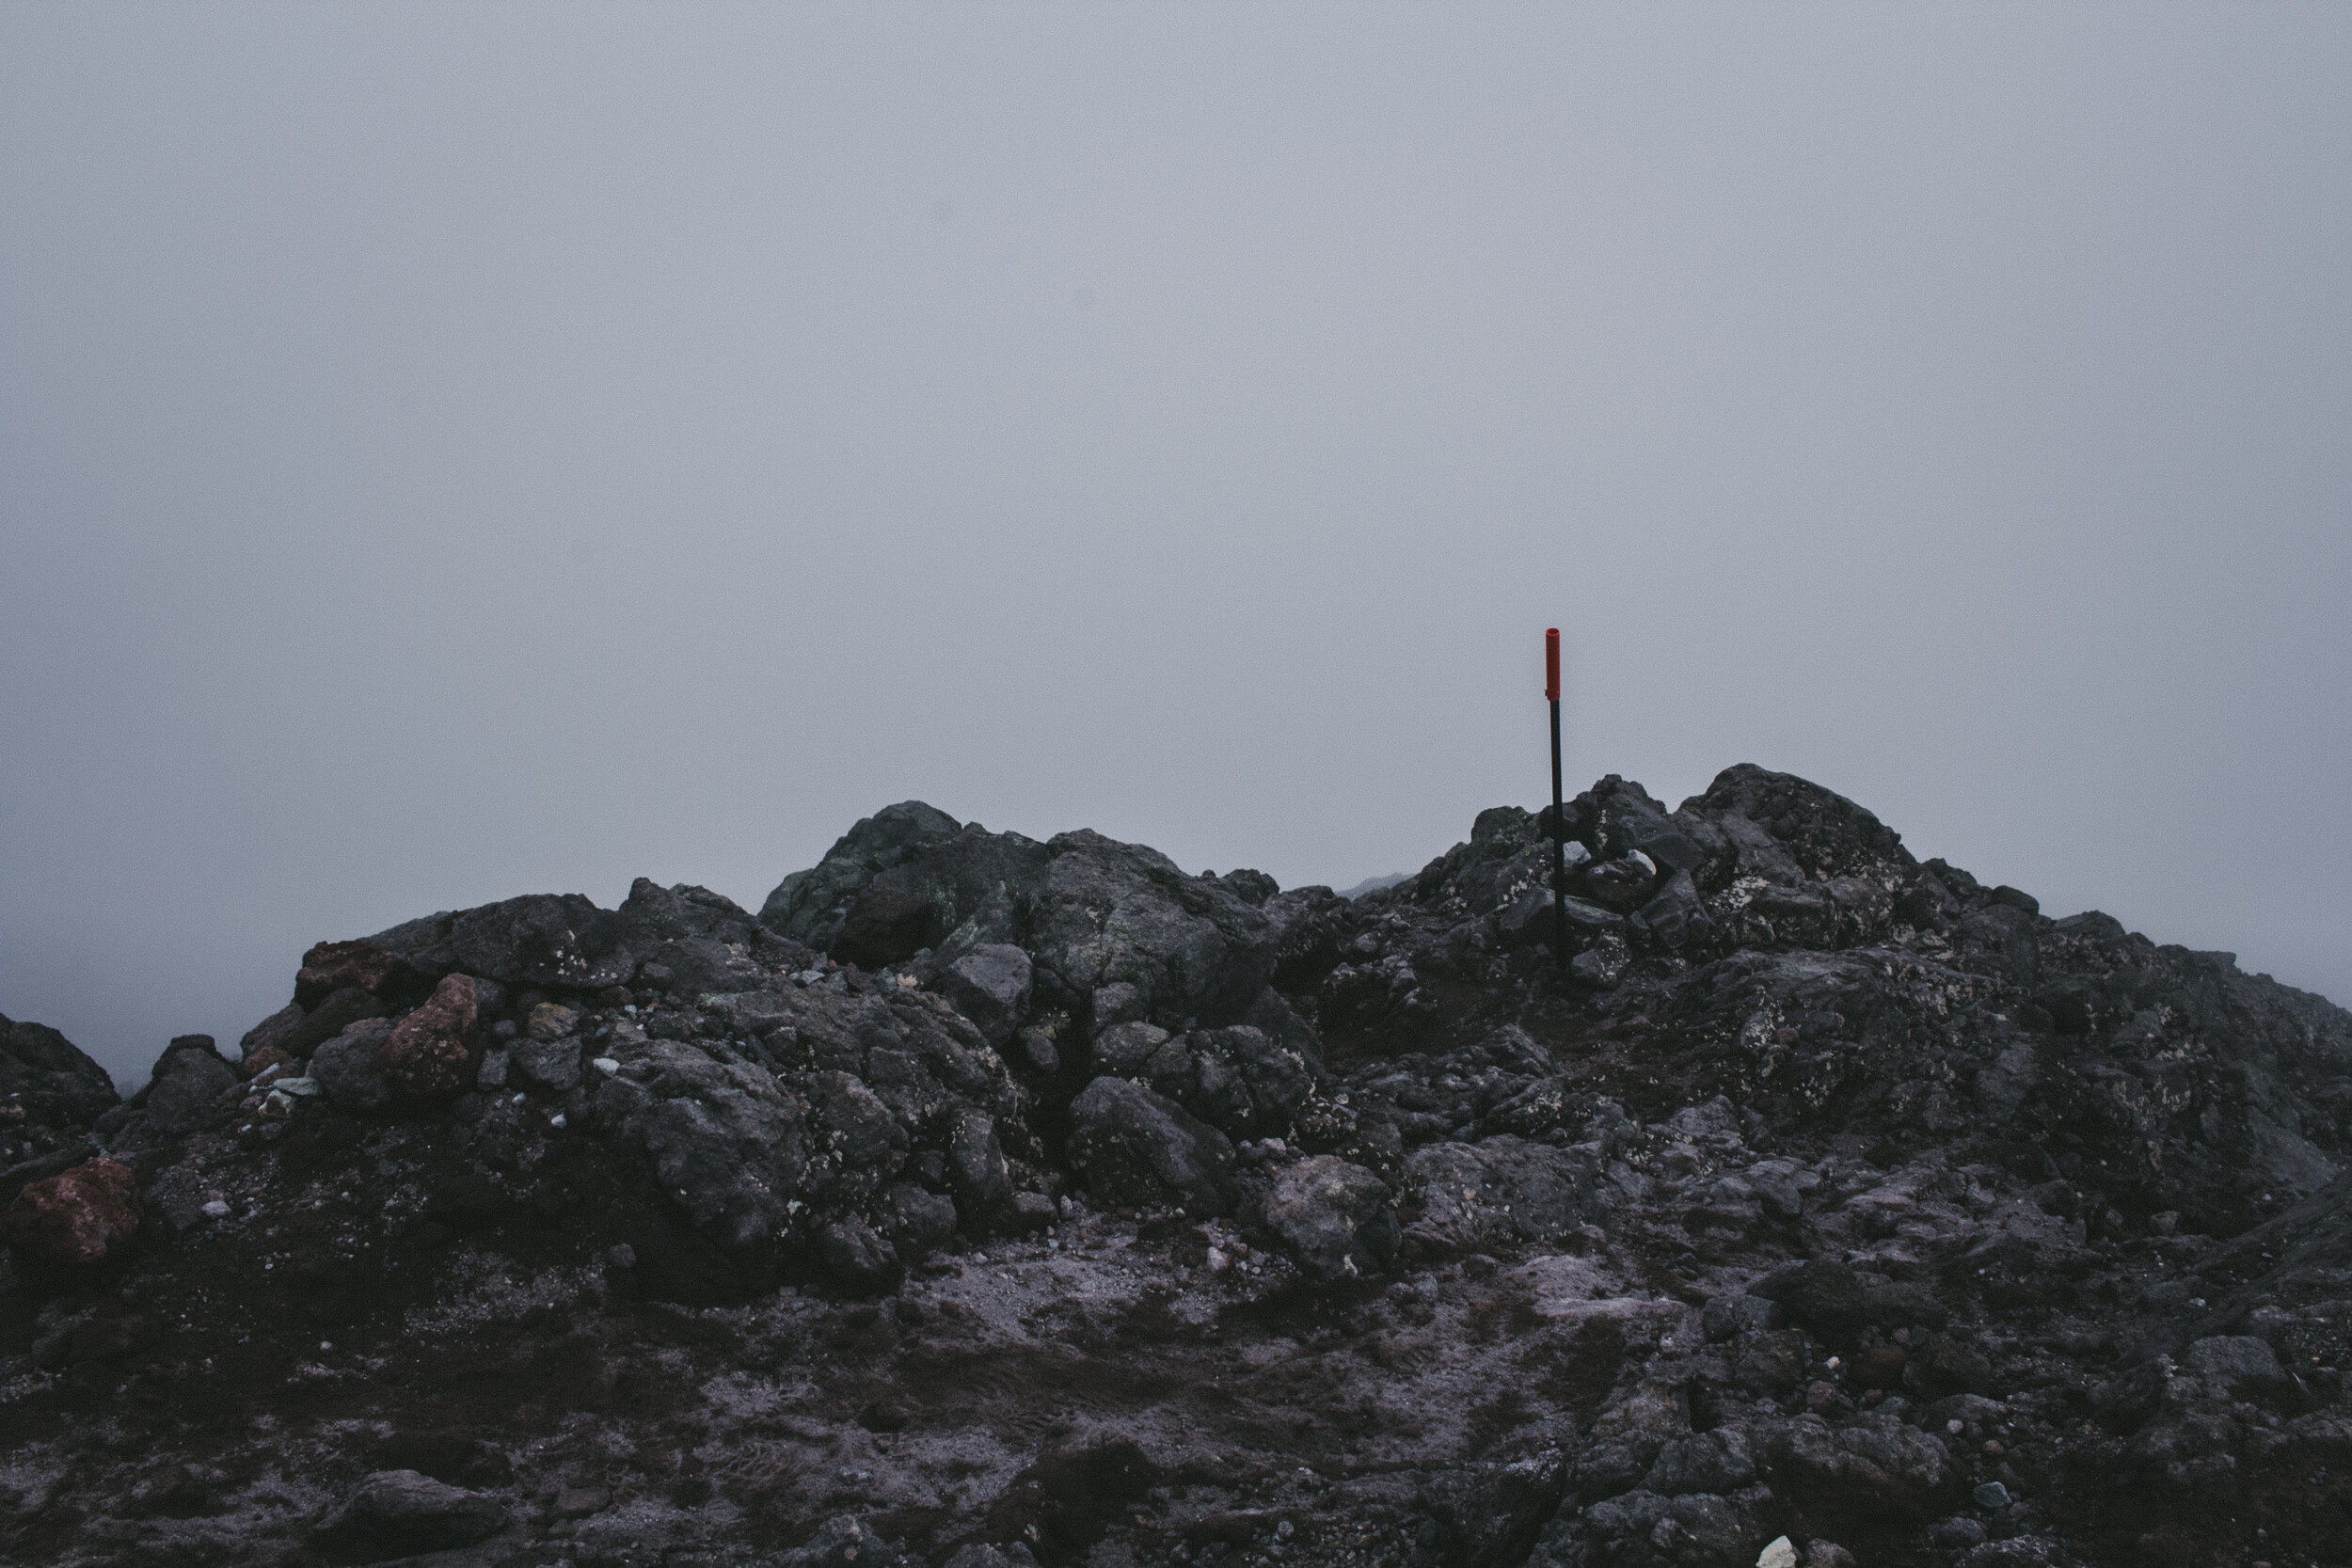
Starting at the top of the stairs, the trail is marked only by poles with orange tops and tiny little numbers on steel plates that give you ~some~ idea of progress.
Once you reach the top of the scree slope, you’ll find solid ground again (yay!) and by solid ground I mean solid rock. Welcome to the rock scrambling part- aka the Lizard.
I suggest you stop for a drink and a snack before you continue.
The rock scrambling is STEEP and exhausting, but at least the ground isn’t constantly slipping out from under you.
You’ll want to keep both hands free for this part.

When you stop to take breaks, take a look down at the incredible alpine plants surrounding you. I’m probably biased, but I thought they were just as cool as the views.
This is also where you’re going to want to pay really close attention to where you’re going. The clouds might roll in and leave you almost blind and there are cliffs on either side of you. What fun!
I ended up on this part of the trail by myself (thanks hiking buddies) when pretty intense cloud cover rolled in. I was just able to see the next orange marker in front of me. It was equal parts terrifying and awesome.
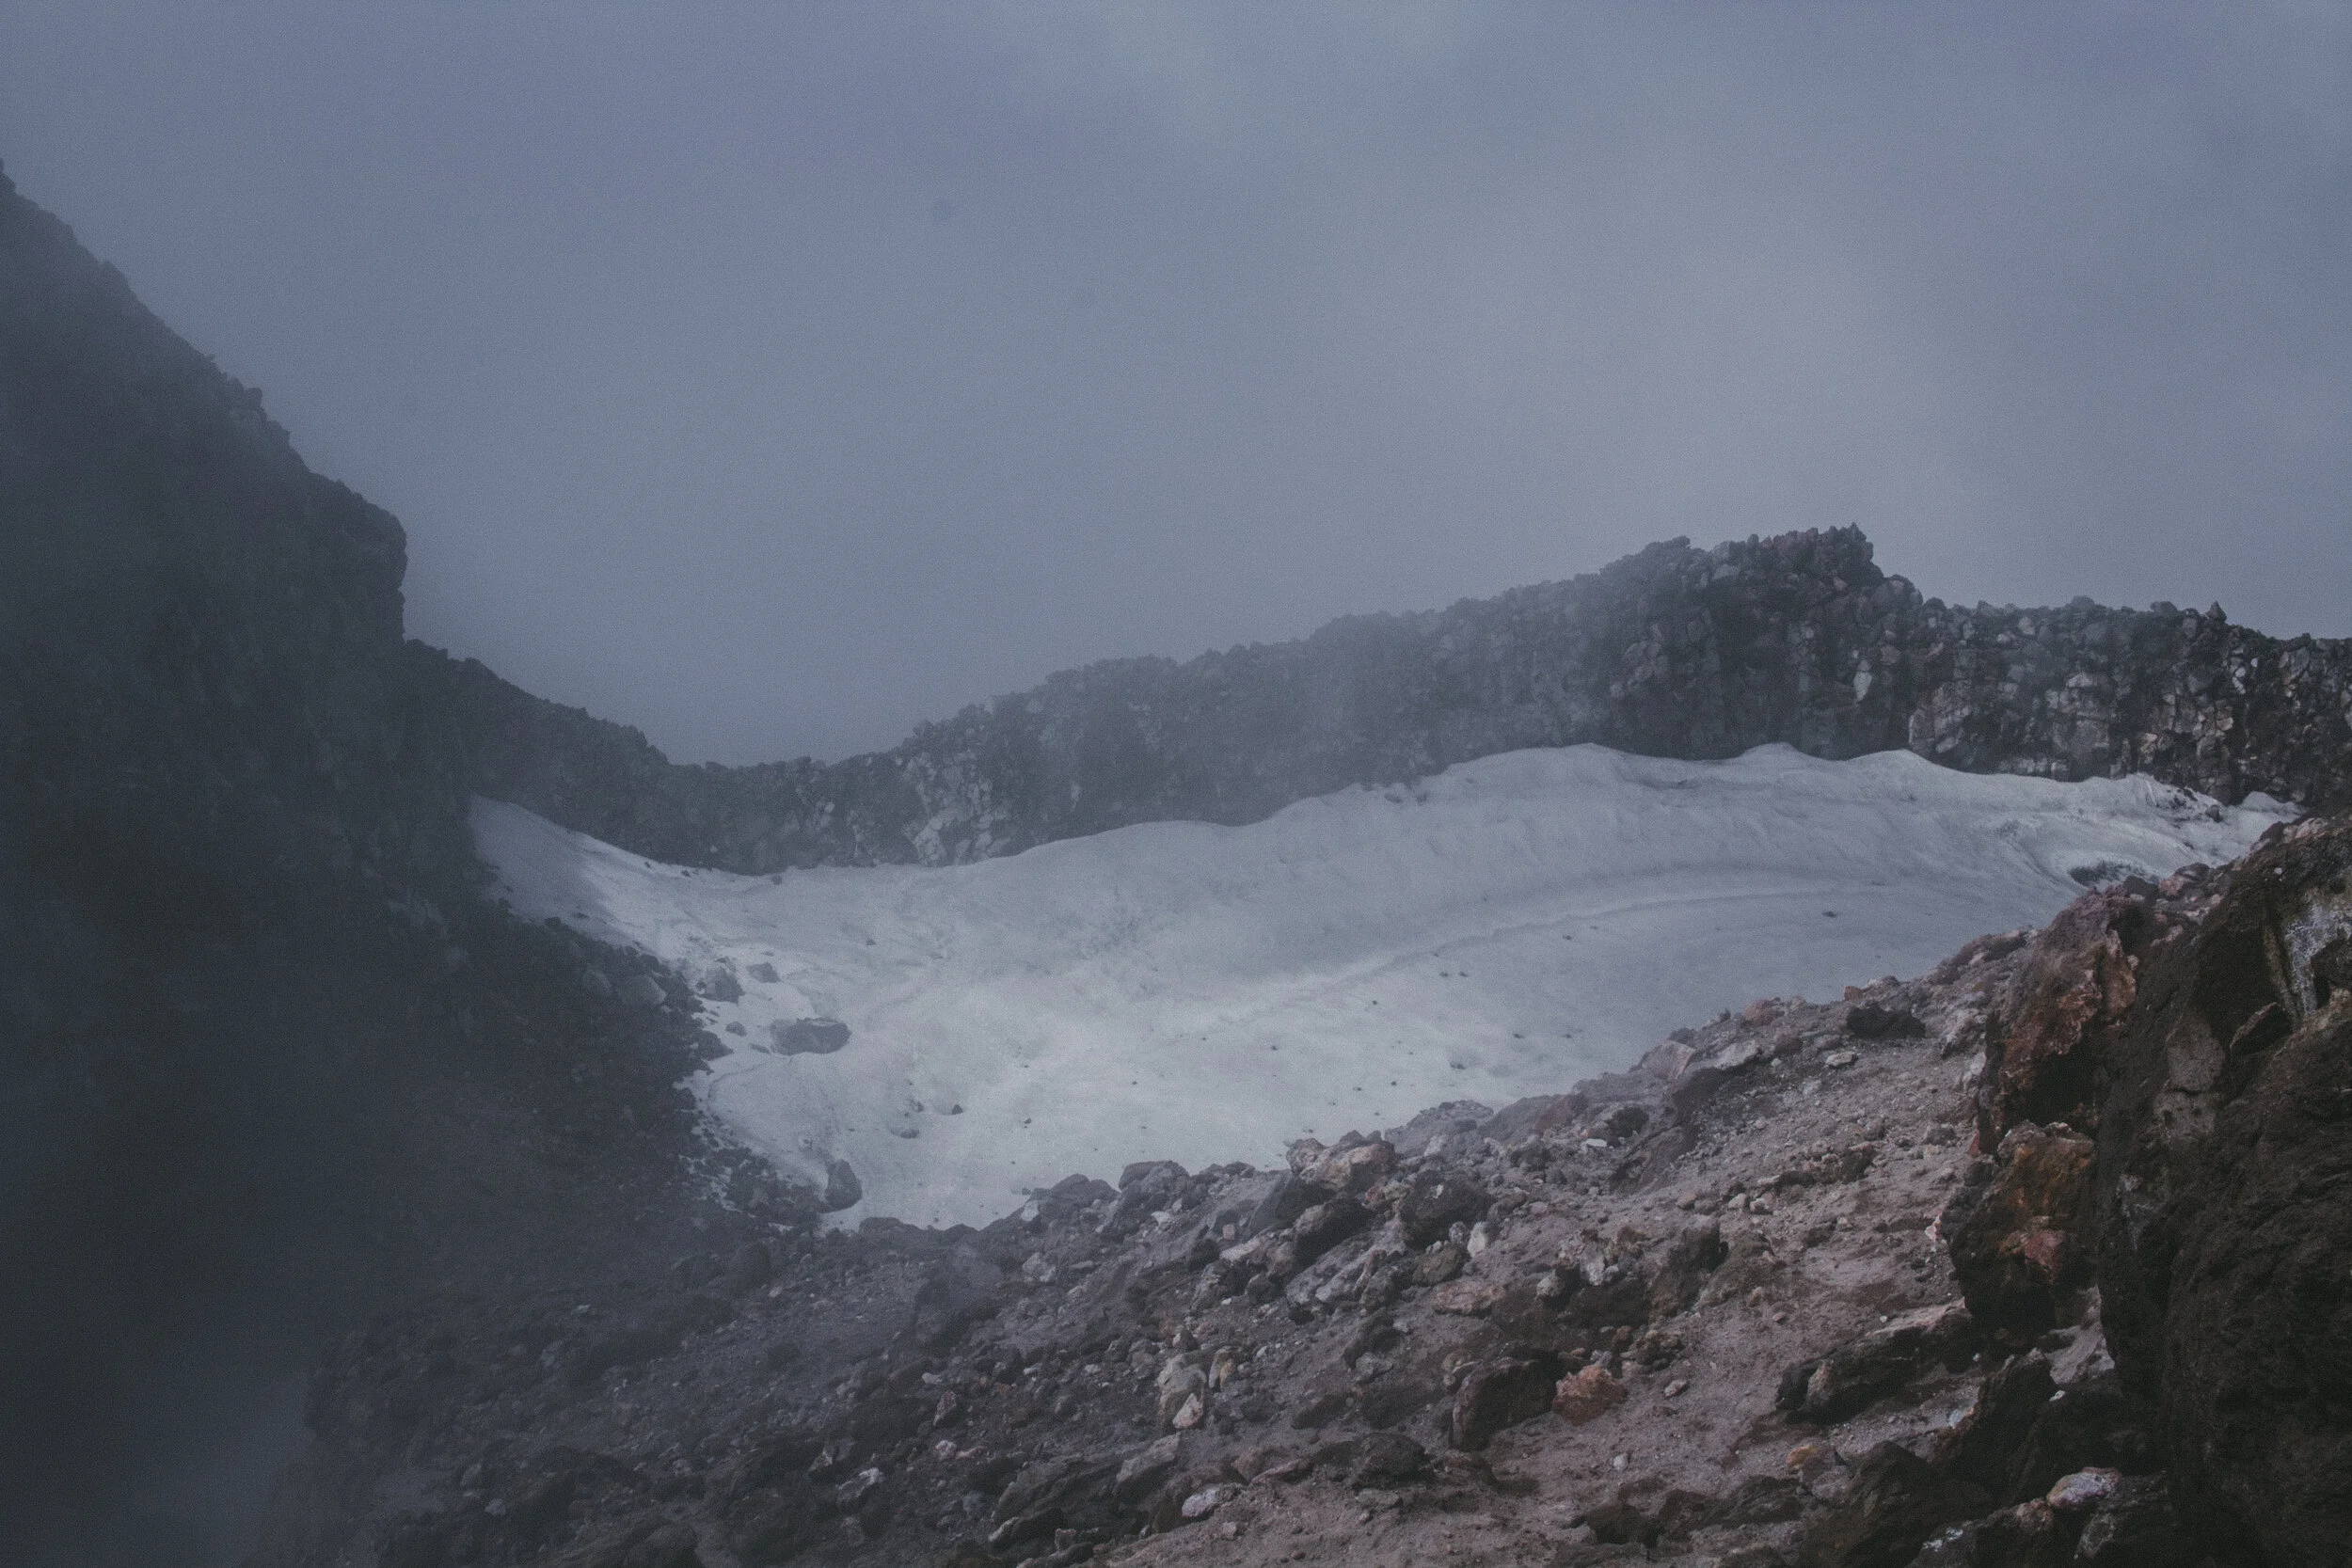
Once you reach the top of the rocks, the poles marking the trails run out and you enter the crater. Luckily the path is fairly obvious from here and there are usually plenty of hikers making the trek across the snow and ice.
Yes, even in the dead of summer the crater is full of snow.
Luckily it wasn’t deep when we hiked it. The crater is pretty flat and if you have good hiking boots the snow shouldn’t be a problem.

Then you have the final scramble up to the summit. It’s pretty much a short version of what you just did, but dare I say steeper.

Finally, you reach the summit. It’s pretty large and flat with lots of rocks to rest on and eat lunch. If you’re lucky the clouds will part and you’ll get a view of the Pacific Ocean 2518 m below.
NOTE: The summit of Mount Taranaki is a sacred place to the Taranaki Maori and you should not cook, litter, toilet or camp there. Respect this place.
Once you’ve finished your lunch and maybe caught a glimpse of the view, it’s time to head back down. Take it slow and watch your footing on the rocky part.
When you get to the scree slope, you have to accept that you’re probably going to fall. It was slippery going up and it will be twice that going down.

I suggest you put your feet at an angle and let yourself slide, doing your best not to fall.
Don’t sit down though, anything that slides over those rocks (skin, pants, backpacks) is going to get shredded.
Once you’ve made it to the bottom of the scree slope, it’s easy-going. Just another 5 km down some steep stairs and road.
You might not be able to walk for a few days after, but I can pretty much guarantee you’ll decide the hike up epic Mount Taranaki was worth it.
Hiking Safety Notes
Don’t underestimate how long this trail will take
Yes, it’s only 6.3 km each way, but there are parts of this trail that are HARD. The terrain near the summit isn’t suitable for running or any fast movement really, and you risk SEVERE injury if you take a bad fall.
Bring plenty of food and water
There’s none on the trail. Take more than you think you’ll need.
Bring the right gear
Please don’t be one of those people who think it’s okay to do this hike in tennis shoes. Yes, you may be fine, but it’s dangerous and a totally unnecessary risk to your safety.

Bring. Warm. Layers.
Mountain. Snow. I don’t care if it’s summer at the base. There’s snow in the crater all year. SNOW.
Scree slope survival:
Take it slow: you’re not running up this part so don’t even try.
Walk at an angle: the easiest way not to spend all your time sliding backward is to take small steps with your feet at a 45-degree angle to the trail.
Lean into it: tbh you’re probably gonna fall here. Most people do. The important thing is to make sure that fall doesn’t take you a few meters down the mountain. When you’re going up, lean forward (especially if you have a big backpack) and when you’re going down, lean back.

Fog and Clouds:
If you do find yourself in a situation where the clouds obscure the trail badly enough that you cannot see the next trail marker, STOP.
The trail is NOT obvious just by looking at the ground and a few steps in the wrong direction can send you over a cliff.
Hiking Gear You Need
Essential Hiking Gear:
Water- 2+ liters PER PERSON
Warm Layer #1 (Merino is best but any athletic wear (not cotton!) will do)
Warm Layer #2 (Merino or fleece)
Waterproof layer
Headlamp
Emergency Blanket
Sunscreen
Sunglasses
Other Great Gear:
Trekking poles
Hat and Gloves
Rainpants (if it gets real cold)
Cell phone & power bank
Camera!

Pro packing tip: shove your fleece and rainpants in the bottom of your backpack for the best weight distribution and a back that’s wayyyy less sore!
What to Wear Hiking:
Hiking Boots
Wool Socks
Trekking Pants, leggings, or workout pants (NOT JEANS)
Non-cotton T-shirt or lightweight long-sleeve shirt

What about a map?
You kind of don’t need one for this hike. The trail is very well marked at the beginning and for the parts where it gets harder to navigate a map will be fairly useless to you anyway. Just follow the orange poles and you’ll be fine.
While Mount Taranaki is the hardest hike I’ve ever done (and probably one of the most dangerous!) I totally recommend this volcano to hikers who are ready to take on the rough terrain and ever-changing conditions.
You’ll be rewarded with one of the most unique experiences in New Zealand!
Any questions? Comment Below!
Have you done this hike? What was your experience?
Check out the New Zealand DOC website for more!
And here’s the Summit Trail Brochure. Note: the DOC says this trail map should NOT be used for navigation!